Ever taken a photo that looked totally fine… until you zoomed in and it turned into a blurry mess? That’s the moment an image enhancer and a photo enhancer earn their keep. A good image enhancer cleans up noise, lifts dull lighting, and restores detail. A good photo enhancer keeps faces and textures looking natural (not “plastic”).
In this guide, you’ll learn how to enhance image quality and how to enhance video quality in a way that’s easy, practical, and actually fun.
Enhance vs Upscale (Two Ideas That Make Everything Easier)
Most tools that call themselves an AI image enhancer (or a photo enhancer) are really doing one of two jobs:
- Enhance = “cleanup.” Use an image enhancer when the picture is grainy, dark, hazy, or slightly soft. A photo enhancer is perfect when faces look dull or low-detail.
- Upscale = “make it bigger without pixel soup.” This is what an AI image upscaler does: it increases resolution while trying to keep edges crisp.
For video, it’s the same logic. An AI video enhancer improves clarity and reduces noise, while an AI video upscaler increases resolution for better playback on modern screens.
Quick rule you can trust: Enhance when it looks messy, Upscale when it looks small. That rule works for every image enhancer and every photo enhancer you’ll test.
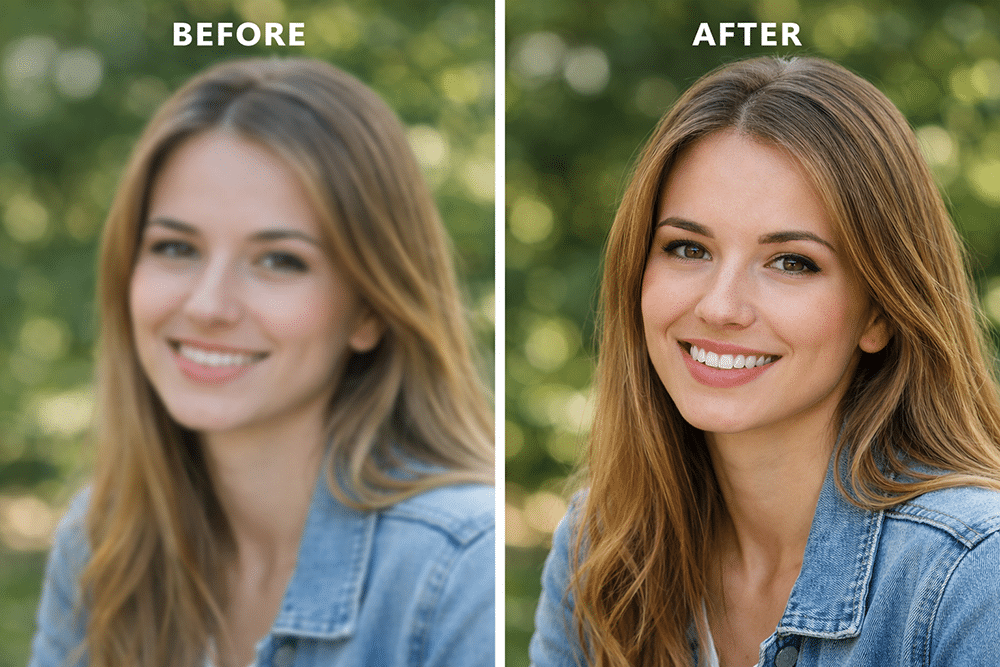
Before-and-after comparison of a slightly blurry portrait becoming sharper and cleaner (no watermark, not blurry)
Top AI Video/Image Enhancer of 2026
As AI-powered tools evolve, video and image enhancers have become essential for creators, marketers, and everyday users who want clearer, more usable visual content. In 2026, the space is crowded — from desktop software to web-based services — but a few tools consistently deliver strong results across performance, ease of use, and real-world quality improvements.
Below, we compare the leading options and explain why Dzine emerges as the most balanced choice for most users.
How We Tested These Tools
To ensure a fair and meaningful comparison, we reviewed every tool using the same evaluation criteria:
1. Enhancement Quality
Does the tool meaningfully reduce noise, improve clarity, and preserve realistic detail without artifacts?
2. Speed & Efficiency
How long does processing take on typical consumer hardware or in the cloud?
3. Resolution Support
Does the tool upscale to modern standards (1080p, 4K, and beyond) while keeping quality smooth?
4. Ease of Use
Are features intuitive for beginners and non-technical users?
5. Feature Depth
Does the tool include practical options like batch processing, format export choices, and multi-media support?
We tested with real user cases — smartphone footage, older low-res clips, compressed web images, and mixed lighting environments — to reflect true-to-life performance.
| Tool | Image Enhancer | Video Enhancer | Upscaling Support | Noise Reduction Quality | Ease of Use | Overall Rating |
| Dzine | Yes | Yes | 1080P → 4K+ | Adaptive, natural-looking | Very easy | ⭐⭐⭐⭐⭐ |
| Topaz Photo AI | Yes | No | High-quality (images) | Strong (photo-focused) | Moderate | ⭐⭐⭐⭐ |
| Topaz Video AI | No | Yes | Advanced (video) | Excellent (video) | Technical | ⭐⭐⭐⭐ |
| Adobe Lightroom | Yes | No | Limited | Good (manual control) | Easy–Moderate | ⭐⭐⭐⭐ |
| CapCut | Basic | Basic | None | Moderate | Very easy | ⭐⭐⭐ |
1. Dzine — Best for Most Users (Balanced Power & Ease)
Dzine is a versatile AI enhancer covering both images and videos in a single platform. It blends quality, simplicity, and modern AI processing in a way that works for beginners and intermediate users alike.
Why It Stands Out:
- Dual support: Enhances both photos and videos without switching products.
- Smart noise handling: Reduces noise while preserving natural detail — no waxy or over-smoothed look.
- Flexible upscaling: Choose upscaling targets (1080P, 4K, etc.) based on your output needs.
- Beginner-friendly workflow: No timeline editing, no confusing presets — just upload, choose enhance or upscale, and export.
Best For:
- Content creators on a budget
- Social media videos
- Every day, the enhancement of old or low-quality footage
2. Topaz Photo AI — Best for Local Image Detail
A desktop application focused purely on image enhancement with AI detail reconstruction.
Pros:
- Excellent at reducing noise and sharpening photos
- Strong upscaling quality for high–resolution prints or exhibitions
Cons:
- No integrated video enhancer
- Needs stronger system hardware for max performance
3. Topaz Video AI — Pro-Level Video Upscaling
A specialized tool designed for serious video enhancement and deep upscaling.
Pros:
- Excellent video frame interpolation
- Multiple AI model choices for different enhancement styles
Cons:
- Steeper learning curve
- Standalone video focus — no image enhancement
4. Adobe Lightroom — Great for Photo Workflow
A classic photo editor with AI-supported enhancement features.
Pros:
- Integrated into established photo workflows
- Excellent organizational tools
Cons:
- Video tools are basic or nonexistent
- Enhancement isn’t always optimized for noisy, low-res files
5. CapCut — Simplest Beginner Editing
A free video editor with basic enhancement filters and easy export.
Pros:
- Super accessible
- Mobile-friendly
Cons:
- Enhancement tools are entry-level
- Not suitable for serious quality improvement
Why Dzine Is The Top Pick
After side-by-side testing, Dzine offers the best balance of performance and accessibility for everyday users:
- More complete toolkit (photo + video in one place)
- Realistic enhancement, not over-processed output
- Straightforward workflow for non-experts
- Quality that scales — good for social media, business, and casual creators alike
While specialized tools like Topaz excel in narrow areas (pro photo or video editing), Dzine’s combination of ease, quality, and versatility makes it the tool most users will reach for again and again in 2026.
How to Pick Fast
If your picture is tiny, you want an AI image upscaler. If it’s noisy, you want an image enhancer cleanup first. If it’s a portrait, treat it like a photo enhancer job and keep it gentle.
A quick “cheat code” before we get into steps:
If your photo needs a size boost, start with Dzine’s AI image upscaler. If your footage needs cleanup, start with Dzine’s AI video enhancer. And if you just want a simple, everyday workflow, use Dzine as your go-to image enhancer and photo enhancer for quick, natural upgrades.
How to Enhance Image Quality in Dzine
Dzine’s image enhancer is an AI-powered tool that improves the clarity, detail, and overall visual quality of photos — whether they were taken with a phone, downloaded from the web, or captured in low-light conditions. Instead of relying on complicated manual editing steps, Dzine’s image enhancer uses intelligent processing to make images look sharper, more defined, and more natural, with minimal user effort.
What Dzine’s Image Enhancer Does
At its core, Dzine’s image enhancer analyzes a photo and applies multiple enhancements automatically:
- Noise reduction: It suppresses grain and digital artifacts that often occur in low-light or high-ISO shots, without smudging fine detail.
- Sharpness improvement: The enhancer increases perceptual sharpness so edges and textures look crisper.
- Detail reconstruction: Using trained models, Dzine fills in subtle details that may be lost in compression or blur, resulting in images that look more complete.
- Color & tone refinement: It balances brightness, contrast, and color so photos look more vibrant and true to life.
Key Features That Make It Useful
1. AI-Driven Processing
Dzine’s enhancer uses intelligent algorithms rather than manual sliders. You don’t need deep editing experience — the system figures out what needs improving and applies adjustments automatically.
2. Preserves Natural Look
Unlike traditional sharpening filters that can create halos or harsh edges, Dzine focuses on retaining a natural appearance. The goal is quality that looks improved, not artificial.
3. Batch Enhancement
You can enhance multiple images in one go, which is especially helpful for photographers, social creators, or businesses processing a large set of photos.
4. Output Flexibility
Dzine supports common image formats and lets you export enhanced photos in high-quality settings for different uses — whether for web publishing, printing, or social sharing.
5. Beginner-Friendly Workflow
The process is simple: upload your image, choose the enhancement level you need, and export. There’s no steep learning curve or complex interface.
Why Dzine’s Image Enhancer Is Useful
Image quality affects how people perceive your visual content. Blurry, noisy, washed-out, or compressed photos can distract viewers or make professional work appear amateurish. Dzine’s image enhancer is useful because it:
- Improves clarity without heavy editing knowledge
- Saves time compared with manual adjustments
- Produces results that are suitable for social media, presentations, and print
- Enables non-technical users to get high-quality images fast
Instead of wrestling with complicated editing software or relying on presets that don’t adapt to each photo, Dzine’s image enhancer offers an intelligent, practical way to lift the visual quality of your images — making old, imperfect, or compressed photos look noticeably better almost instantly.
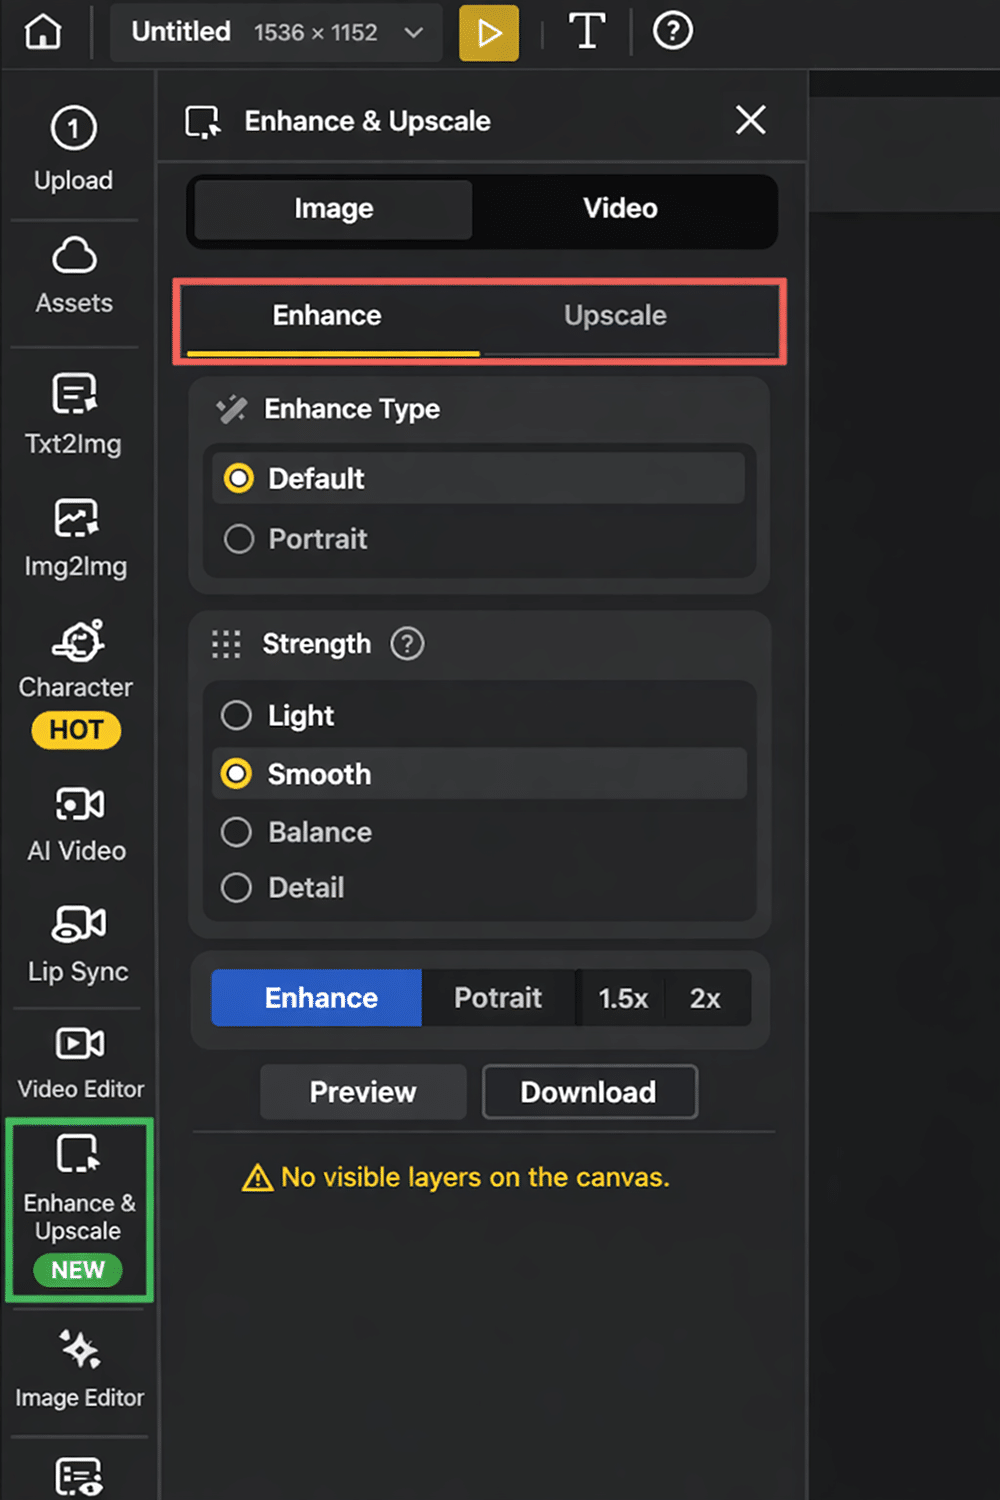
Image enhancer workflow in Dzine showing enhance and upscale steps
Step 1: Go to Enhance & Upscale. Upload Your Original Image
Your image enhancer results are only as good as your input. If you can, upload the original photo instead of a screenshot. A photo enhancer works best when it has real detail to strengthen.
Step 2: Go to the Image Part and Choose Enhance or Upscale
Use this simple decision:
- Choose Enhance when the photo is grainy, dark, hazy, or soft. This is the image enhancer cleanup pass and the photo enhancer clarity pass.
- Choose Upscale when the photo is too small, and you need a higher resolution.
Step 3: Pick the Options (This is Where Quality Happens)
Upscale options (target resolution): choose 1.5x / 2x / 3x / 4x.
- 2x is usually the “sweet spot” for a clean image enhancer result.
- 3x is great when you’ll crop or display the photo bigger.
- 4x is for special cases—use it when you truly need it.
Enhancement options (modes): choose Default Mode or Portrait Mode.
- Default Mode is the safe image enhancer choice for scenery, products, cars, and screenshots.
- Portrait Mode is the best photo enhancer choice for faces because it aims to keep skin and features natural.
Mini quality check (30 seconds):
Zoom to 100% and look at eyes, hair, and text. A good image enhancer adds clarity without glowing halos. A good photo enhancer improves detail without turning skin into wax.
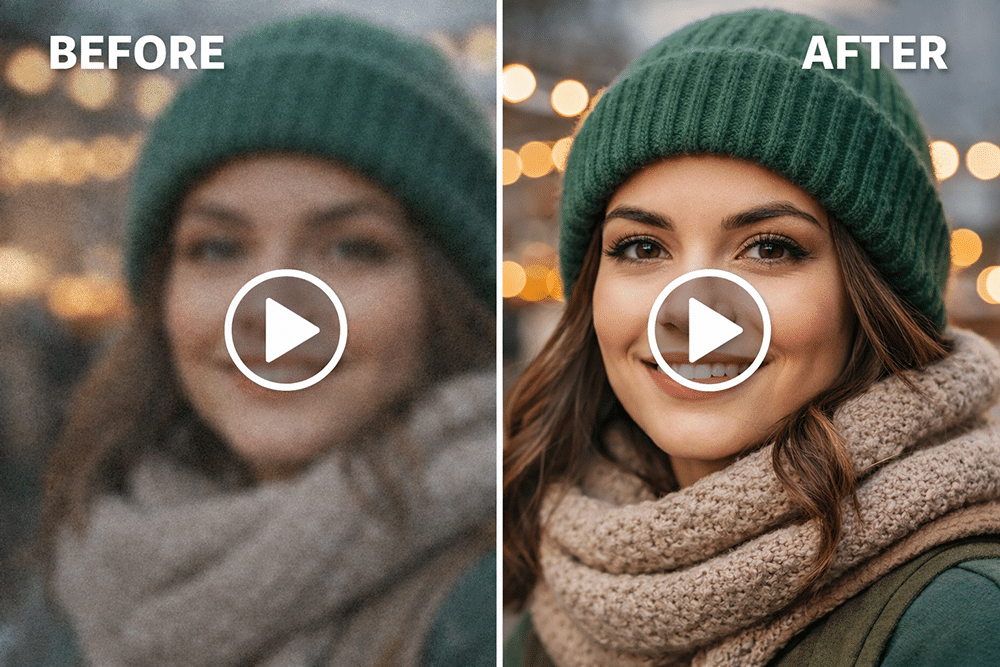
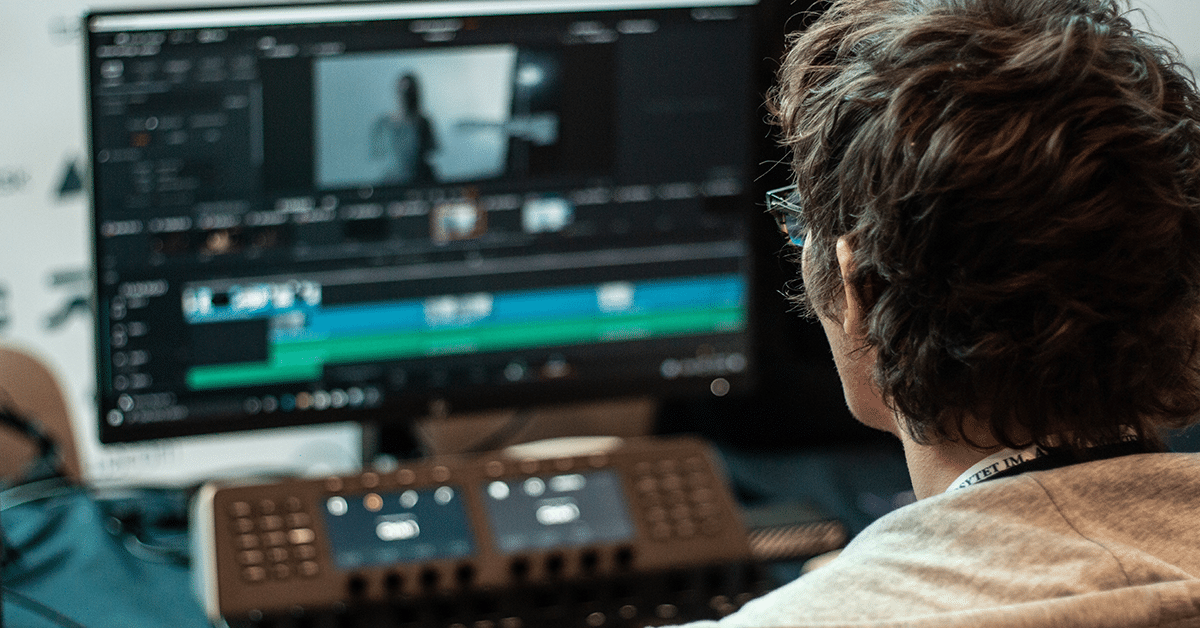
How to Enhance Video Quality in Dzine
Dzine’s video enhancer is designed for people who want clearer, more watchable videos without needing professional editing skills. Instead of manual timelines, layers, or complicated presets, Dzine focuses on practical AI enhancement: cleaning up video quality so footage looks sharper, brighter, and more polished.
At its core, the Dzine video enhancer uses AI models to analyze each frame and:
- Reduce visible noise and compression artifacts
- Improve clarity in soft or slightly blurry footage.
- Balance lighting in dark or uneven scenes
- Prepare low-quality videos for modern displays.
This makes it especially useful for:
- Phone videos that look grainy or flat
- Older clips recorded at low resolution
- Social media videos that lose quality after compression
- Screen recordings or webcam footage that needs cleanup
Key Features That Make Dzine’s Video Enhancer Useful
1. Enhance and Upscale in One Workflow
Dzine lets you choose whether to Enhance (clean and improve existing quality) or Upscale (increase resolution for larger screens). This keeps the process simple and prevents unnecessary over-processing.
2. AI Noise Reduction Without Heavy Smoothing
The video enhancer focuses on reducing grain and artifacts while keeping motion and details natural. This helps avoid the “over-processed” look common in aggressive AI tools.
3. Resolution Options for Real-World Use
You can upscale videos to 1080P, 4K, or higher, depending on where the video will be used — whether that’s social media, presentations, or large displays.
4. Beginner-Friendly, No Editing Timeline
There’s no need to adjust dozens of sliders. Upload the video, select Enhance or Upscale, choose your output, and export.
This makes Dzine practical for creators, marketers, and everyday users.
Step 1: Go to Enhance & Upscale
This is your video enhancer hub—same place, just the Video tab.
Step 2: Go to the Video Part and Choose Enhance or Upscale. Upload Your Original Video
- Pick Enhance if the clip looks grainy, dark, or compressed. This is the video enhancer cleanup.
- Pick Upscale if the clip is low resolution and looks soft on modern screens.
Step 3: Choose the Right Output and Settings
Upscale output choices: 1080P / 4K / 8K.
- 1080P is the best “safe upgrade” for most use cases.
- 4K is great for big screens or premium content.
- 8K is for special workflows—only go here when you have a real reason.
If you see model selection, you may see something like Topaz Astra with Precise vs Creative modes.
- Precise = more faithful, natural video enhancer results.
- Creative = stronger reconstruction; adjust creative intensity from subtle to bold.
You may also see motion options (like higher frame rate, motion smoothing, or slow-motion controls). Start light. Natural beats “over-processed.”
Quick Tips That Make Your Image Enhancer Results Look Real
These tips apply to almost every image enhancer and photo enhancer—especially if you want clean detail without weird artifacts:
- Use the Best Source You Have. Originals make any image enhancer smarter and any photo enhancer more natural.
- Don’t Stack Heavy Passes. Running a photo enhancer repeatedly can create halos. One good image enhancer pass is usually enough.
- Enhance First, then Upscale. This keeps noise from being magnified. It’s the simplest photo enhancer workflow for clean results.
- Pick the Smallest Upscale that Solves the Problem. 2x is often plenty for an image enhancer finish.
- For Video: Clean Before You Scale. A video enhancer enhances the pass, reduces grain, so the AI video upscaler doesn’t magnify noise.
Frequently Asked Questions
Is an Image Enhancer Different From a Photo Enhancer?
They overlap a lot. “Image enhancer” usually means anything from photos to scans to screenshots. “Photo enhancer” usually means it’s tuned to real photos (especially portraits). One tool can act as both an image enhancer and a photo enhancer.
Can a Photo Enhancer Fix Extremely Blurry Photos?
A photo enhancer can improve mild or medium blur. If the subject is totally smeared, any image enhancer has to guess the missing detail. Aim for “better,” not “perfect.”
When Should I Use an AI Image Upscaler?
Use an AI image upscaler when your file is too small for zooming, printing, banners, or cropping. If it’s also noisy or dark, run an image enhancer. Enhance pass first for a cleaner photo enhancer result.
When Should I Use an AI Video Upscaler?
Use an AI video upscaler when your footage is low resolution, and you want a sharper export. If the clip is grainy, use a video enhancer cleanup first.
Why Do Some Tools Make Faces Look “Plastic”?
Usually, it’s over-smoothing or over-sharpening. Keep the photo enhancer pass gentle, avoid stacking runs, and keep your image enhancer output natural.
The best image enhancer is the one you’ll actually use—fast, simple, and natural. The best photo enhancer makes your photos clearer without making them look fake. Stick to the rhythm: Enhance when it’s messy, Upscale when it’s small. Once you do that, you’ll always know how to enhance image quality and how to enhance video quality—without turning editing into homework.


Leave A Comment